
I Love this idea and the site is amazing! Go check it out right now!
Tutorial: How to make a Fabric Headboard
In my master bedroom, I wanted an extra large headboard that would make a statement. Here are my instructions on how to make a fabric headboard...not just any fabric headboard...you'll see.
Step 1: Find fabric that you love! I found this fabric at my favorite fabric store called Home Fabrics and Rugs. It cost 5.99 a yard, and I bought 10 yards. (I still have some left over, but we'll just play it safe and say it cost me $59.00 for the fabric. One of the main reasons I chose this fabric was because it was neutral in color. I like to change the colors in my room every year or two, and this fabric will allow for that. Sidenote: think of how cheap this would be if you got fabric at Home Fabric's $1.00 a yard sale!
 Step 2: Measure your space. We wanted ours to take up basically the whole wall. :) Go big or go home right!?!?
Step 3: Divide your space into squares. You can decide how big your squares will be. BUT...an important part of this is to make sure that your fabric pattern is large enough to make enough squares with the exact same pattern.
Step 4: Buy 2 sheets of thin backer board and cut them PRECISELY the right size. Thanks to my hubsters, I didn't have much to do with this part. The boards we bought cost approx. $6.00 each so with both of them we spent $12.00. Sidenote: your second sheet of the board will be used to mount your squares to.
 Step 5: Buy some foam and cut it into precisely the right size. We used mattress toppers. We bought one at Wal-Mart for $7.00 and bought another at a yard sale for $2.00. The foam we bought was 1 inch thick. Total for foam: $9.00.

Step 6: Cut the fabric. You need to add 1 1/2 inches on all four sides to allow extra fabric for upholstering. Sidenote: make sure you have a sharp blade on your olfa cutter or a sharp set of fabric scissors. I ended up cutting them all by hand because my olfa blade was not working.
 Step 7: Upholster every square.
I'm not going to lie, this part was very frustrating. We found that the boards were not easy to upholster to because the boards were very hard to get the staples to go into. So, LEARN FROM MY MISTAKE...make sure you buy a board that staples will go through.
We had to HOT GLUE to fabric onto the boards and then the staples would go through. This added a few steps and a lot of time to the process.
We also made pencil marks on the back sides of the boards to use as guides of how far to pull the fabric. We wanted each square to look the EXACT same to make sure the patterns weren't messed up.

 Step 8. Prep your space. In our case we wanted the headboard to be a contrasting color to the wall, so my cute hubby painted it charcoal gray. (Update 5/19/10: I do not have the exact color of paint because it was an OOPS paint from Home Depot and the oops paints are not tinted correctly. I would give you the color if I knew it). I knew that most of the wall would be covered with the headboard and only a few feet on each side would show of the gray, so I was not worried about the color being too dark.
 Step 9: Lay out your squares and decide on their position. It will be to your advantage to decide on the exact place of your squares ahead of time. Although we tried our hardest to make sure that each square was precisely the same size, we still moved squares around because some fit better than others.
 Step 10. Mount the squares on the backer board securely.
UPDATE (May 19) I wanted to answer some of your questions about the mounting process. We (my husband and I) decided to mount the individual boards to one larger backer board so that it could be hung as one piece. We used liquid nails and short 1/4 inch wood screws to secure the upholstered boards to the backer board.
After all 17 boards were secure, we used two D-ring hooks to hang the headboard. Important: We had to install the D-rings in precisely the right place on the back of the headboard. The hooks were aligned for studs in the wall since the headboard was so heavy.

 Step 11: Hang your headboard. (Make sure your hardware is secured to studs in the wall).

 Step 12: ENJOY!

Step 1: Find fabric that you love! I found this fabric at my favorite fabric store called Home Fabrics and Rugs. It cost 5.99 a yard, and I bought 10 yards. (I still have some left over, but we'll just play it safe and say it cost me $59.00 for the fabric. One of the main reasons I chose this fabric was because it was neutral in color. I like to change the colors in my room every year or two, and this fabric will allow for that. Sidenote: think of how cheap this would be if you got fabric at Home Fabric's $1.00 a yard sale!
 Step 2: Measure your space. We wanted ours to take up basically the whole wall. :) Go big or go home right!?!?
Step 3: Divide your space into squares. You can decide how big your squares will be. BUT...an important part of this is to make sure that your fabric pattern is large enough to make enough squares with the exact same pattern.
Step 4: Buy 2 sheets of thin backer board and cut them PRECISELY the right size. Thanks to my hubsters, I didn't have much to do with this part. The boards we bought cost approx. $6.00 each so with both of them we spent $12.00. Sidenote: your second sheet of the board will be used to mount your squares to.
 Step 5: Buy some foam and cut it into precisely the right size. We used mattress toppers. We bought one at Wal-Mart for $7.00 and bought another at a yard sale for $2.00. The foam we bought was 1 inch thick. Total for foam: $9.00.
Step 6: Cut the fabric. You need to add 1 1/2 inches on all four sides to allow extra fabric for upholstering. Sidenote: make sure you have a sharp blade on your olfa cutter or a sharp set of fabric scissors. I ended up cutting them all by hand because my olfa blade was not working.
 Step 7: Upholster every square.
I'm not going to lie, this part was very frustrating. We found that the boards were not easy to upholster to because the boards were very hard to get the staples to go into. So, LEARN FROM MY MISTAKE...make sure you buy a board that staples will go through.
We had to HOT GLUE to fabric onto the boards and then the staples would go through. This added a few steps and a lot of time to the process.
We also made pencil marks on the back sides of the boards to use as guides of how far to pull the fabric. We wanted each square to look the EXACT same to make sure the patterns weren't messed up.

 Step 8. Prep your space. In our case we wanted the headboard to be a contrasting color to the wall, so my cute hubby painted it charcoal gray. (Update 5/19/10: I do not have the exact color of paint because it was an OOPS paint from Home Depot and the oops paints are not tinted correctly. I would give you the color if I knew it). I knew that most of the wall would be covered with the headboard and only a few feet on each side would show of the gray, so I was not worried about the color being too dark.
 Step 9: Lay out your squares and decide on their position. It will be to your advantage to decide on the exact place of your squares ahead of time. Although we tried our hardest to make sure that each square was precisely the same size, we still moved squares around because some fit better than others.
 Step 10. Mount the squares on the backer board securely.
UPDATE (May 19) I wanted to answer some of your questions about the mounting process. We (my husband and I) decided to mount the individual boards to one larger backer board so that it could be hung as one piece. We used liquid nails and short 1/4 inch wood screws to secure the upholstered boards to the backer board.
After all 17 boards were secure, we used two D-ring hooks to hang the headboard. Important: We had to install the D-rings in precisely the right place on the back of the headboard. The hooks were aligned for studs in the wall since the headboard was so heavy.

 Step 11: Hang your headboard. (Make sure your hardware is secured to studs in the wall).
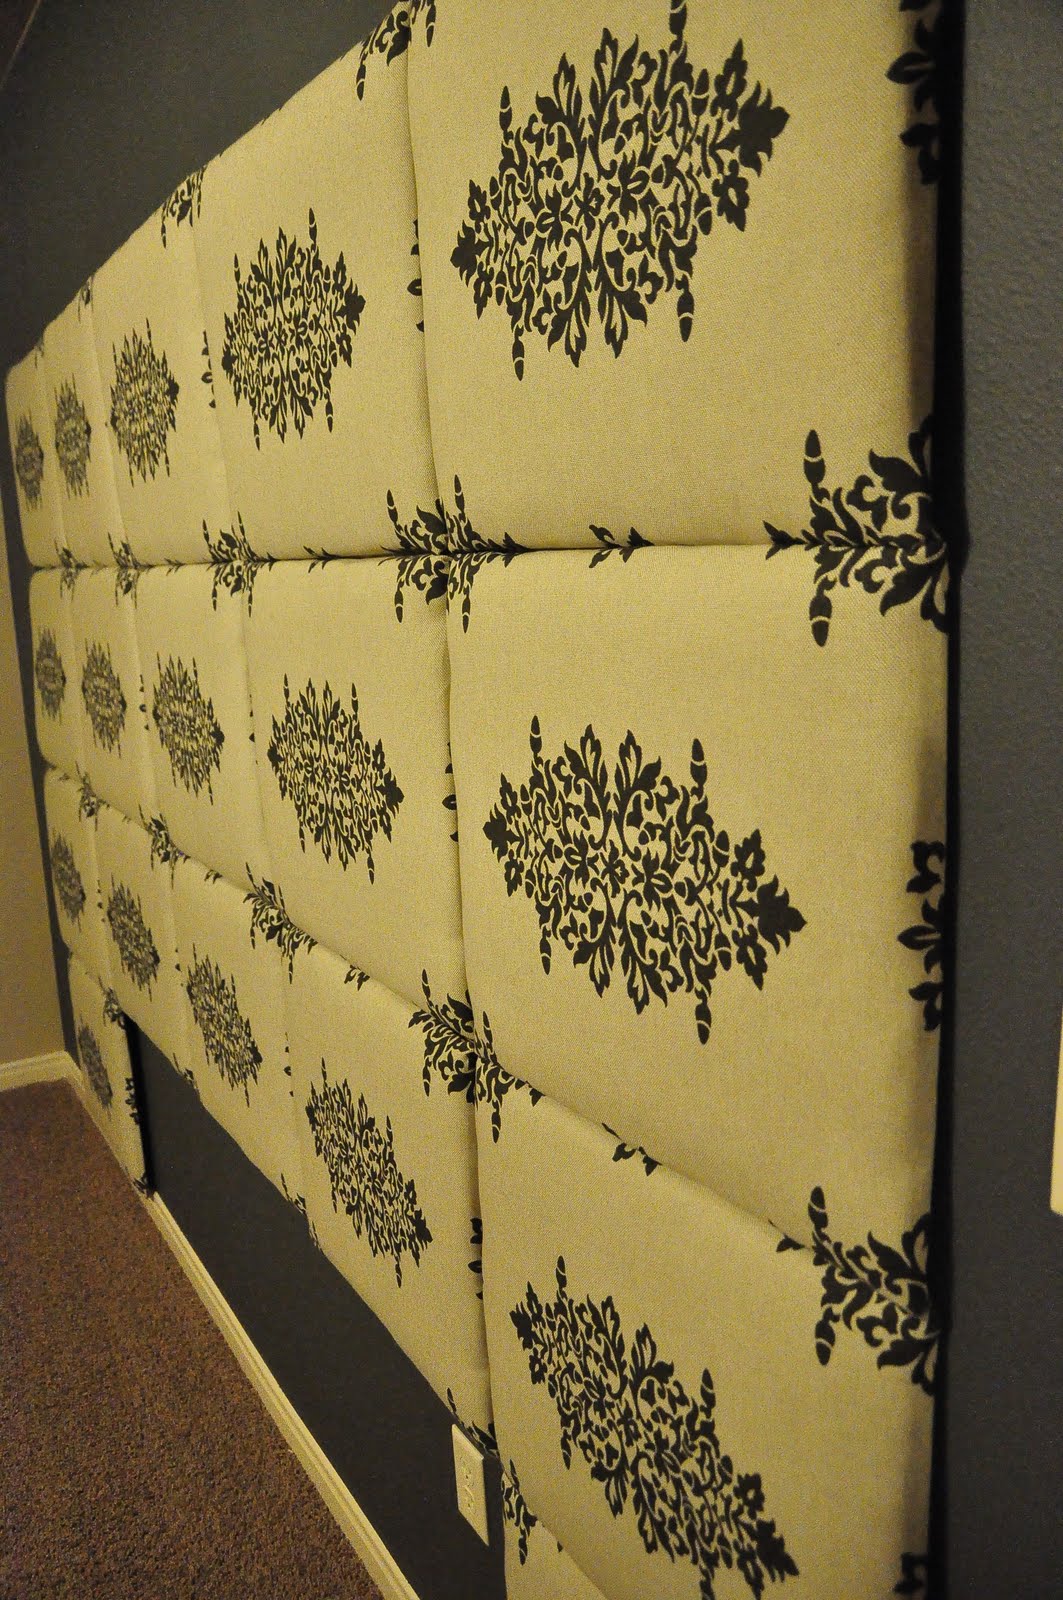
 Step 12: ENJOY!


0 comments:
Post a Comment